English version here.
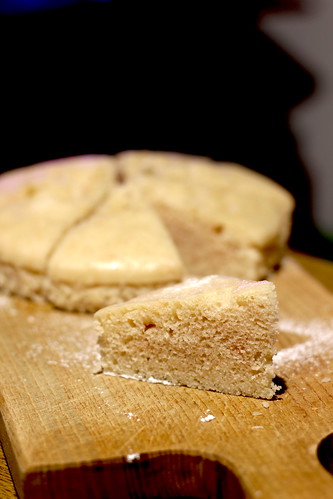
La foto

Dati EXIF qui.
La storiella
Adoro le feste a casa degli amici. Specialmente quando devo cucinare qualcosa a casa di chi organizza! Mi sa che il cuoco a domicilio sia una delle professioni ideale per chi ama stare ai fornelli.
Non ho esperienza a riguardo, ma dopo aver letto e guardato un sacco di roba riguardante chef e ristoranti posso dire che gestire il proprio ristorante coinvolge 24 ore della propria giornata. Essere appassionati (vedi ossessionato) credo sia fondamentale. Pensare a quello in ogni momento della giornata. Ogni decisione nella giornata è basata sul lavoro. In soldoni, se vuoi fare le cose fatte bene (vedi alla perfezione...) non si ha tempo di fare nient'altro. E se non lo si fa vuol dire che fallimento o sopravvivenza. (Non l'ho detto io, lo dice lui):D
Se si è organizzati magari si trova del tempo libero. Ma secondo me non abbastanza per dedicarlo alla famiglia, per esempio.
Vedo molte persone che cercano di fare troppe cose anche se non hanno tempo e risorse (a meno di non incastrare tutto al secondo...). Alla fine non ne finiscono manco una si stressano, sono perennemente insoddisfatte e... non hanno mai tempo di far niente. :) Preferisco l'approccio minimalista, fare poche cose ma bene. Anche se i miei amici dicono che sono noioso: cucini, corri, fai foto e basta! Lo so, ma mi diverto a farlo. :D
Ok bei pensieri, ma quindi?
Ah si, volevo solo dire che secondo questi ragionamenti un cuoco a domicilio ha potenzialmente più tempo libero di un cuoco. Siccome è un lavoro freelance ci si può anche rifiutare di andare a cucinare la cena di mercoledì perché voglio andare al cinema con la morosa/moglie o andare a giocare a tennis con Gastone. Quindi alla fine ce la si gode meglio. Magari sono castronerie, gli addetti ai lavori sono autorizzati a negare il tutto. :D
Di soldi non ne ho presi per la ricetta di oggi, dei muffin che ho preparato per la festa di sabato scorso. Ma ne è valsa la pena in base a l'equazione: $3.5 di ingredienti => 3.5 ore di festa! :D
La ricetta
Ingredienti Mise en place per 24 muffins
- Zucca pelata tagliata a dadini da 2 cm: 300 g
- Farina autolievitante: 370 g
- Maizena o fecola di patate: 30 g
- Sale: un pizzico
- Uova: 4 (200 g)
- Burro fuso: 100 g
- Zucchero: 170 g
- Cioccolato fondente tritato: 100 g
Preparazione
- Forno 180°
- Preparare teglie per 24 muffins
- Zucca in microonde a massima potenza per 8-10 minuti con un filo di acqua fino a quando risulta molto morbida
- Setacciare (2 volte meglio) sale, farina e maizena in una grande ciotola, fare un buco al centro
- Frullare assieme uova, zucchero, zucca, burro
- Versare i liquidi nella ciotola con la farina
- Con una frusta, incorporare la farina e cioccolato nei liquidi, non mescolare troppo lasciare il composto grumoso
- Versare nelle teglie
- Infornare 30-35 minuti (fare la prova stecchino)
- Far raffreddare su una gratella
- done.
Dati nutrizionali
| Calorie | 339 kcal |
| Carboidrati | 57% |
| Proteine | 8% |
| Grassi | 35% |
L'angolo della cultura
La zucca è poco calorica, 26 kcal/100 g. Per questo motivo è oltre che buona, sana e adatta per piatti dolci e salati. I semi sono pure buoni, basta tostarli in forno per una ventina di minuti a 180°. Non serve spellarli.
Share
The photo
EXIF data here.
The little history
I love house parties. Especially when I have to cook something in advance in the host kitchen! At the moment I think being a personal chef is the perfect balanced lifestyle if you enjoy cooking.
I don't have any experience on it but after reading and watching a lot of videos related to chefs and restaurants I can say that manage your own restaurant involved 24 hours of your day. You have to love it and be passionate about what you do (obsessed). Every moment of your day you think about it. Every decision of your life is based on your business. Basically, if you want to do thinks properly (perfectly...) you don't have time to do anything else. Or maybe you will have some.
But in my opinion, not enough for growing a family in a good way, for example
Maybe you can, if you are very organized.
But I see many people that try to do too many things even if they can't resulting in never ending task that lead to stress and unsatisfaction. I prefer to do fewer things, but very well. Even if my friends say that I am boring: you only cook, run and take photos! Yes, I know, but I enjoy what I do. :D
Ok nice randomly thoughts, so what's the point? :)
Ah yes, I just want to say that a personal chef can potentially have more free time than a full time chef. Since is a freelance job, sometimes you can refuse to go cooking a dinner on Wednesday evening and go to the cinema with your girlfriend/wife or playing tennis with your mate. So a better life. And here we could say "sometimes money can catch your time before your friends"... :)
Money didn't come for today's recipe since they were muffins that I baked for last Saturday house warming party. But the equation was worth: $3.5 ingredients => 3.5 hours of fun! :D
The recipe
Ingredients Mise en place (for 24 muffins tot $3.52)
- Pumpkin peeled and diced in 2 cm cubes: 300 g ($0.3)
- Self raising flour: 370 g ($0.33)
- Cornflour: 30 g ($0.225)
- Salt: a pinch
- Eggs: 4 (200 g) ($0.84)
- Melted butter: 100 g ($0.6)
- Caster sugar: 170 g ($0.22)
- Dark chocolate, in small pieces: 100 g ($1)
Method
- Preheat oven to 180°
- Prepare muffin trays for 24 muffins
- Cook pumpkin in the microwave for 8-10 minutes, it should be very soft
- Sieve (2 times is better) salt, flour and cornflour in a big bowl, make a hole in the center
- In a blender, mix eggs, sugar, butter and pumpkin
- Put the liquid ingredients in the bowl with the dry ingredients
- With a whisk incorporate dry ingredients and chocolate into the liquids, not overmix the batter should be lumpy
- Fill the trays with the batter
- Bake for 30-35 minutes (test with a skewer in the center of a muffin, it should come out dry and clean)
- Cool on a cooling rack
- done.
Nutritional facts
| Calories 100 g | 339 kcal |
| Carbohydrates | 57% |
| Proteins | 8% |
| Fat | 35% |
The culture corner
Pumpkin is very low in calories, 26 kcal/100 g. For that reason is very good and healty for both savory and sweet dishes. Seeds are also good, just toast in the oven for 20 minutes at 180°. You don't need to peel them.
Share