Visualizzazione post con etichetta cioccolato. Mostra tutti i post

mercoledì 14 marzo 2018

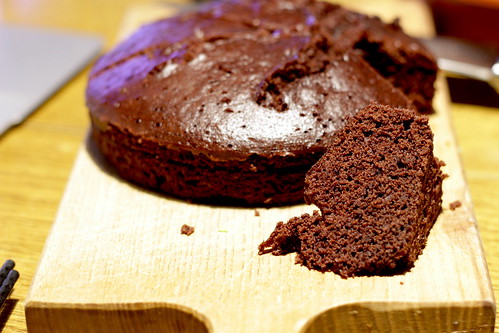
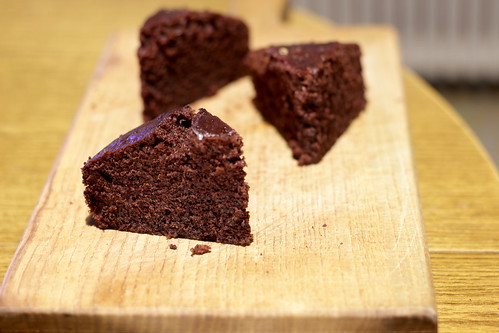
Torta al cacao senza forno (al vapore) • Chocolate cake no bake (steamed)

English version here.

Chocolate cake no bake (steamed)

La ricetta

Rivisitazione della ricetta di Giallozafferano.

Attrezzatura

  • 2 ciotole
  • Frusta
  • Spatola (la Marisa)
  • Tortiera da 18 cm
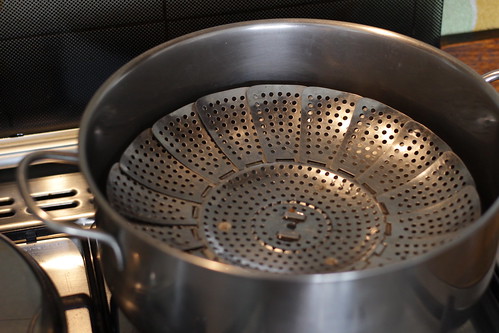
  • Cestello per cottura al vapore
  • Pentola + cestello per cuocere al vapore + coperchio
    Steaming setup

Ingredienti

Ingredientex8x16x32
Zucchero 100 200 400
Acqua 165 330 660
Olio vegetale 45 90 180
Farina 00 130 260 520
Cacao 20 40 80
Lievito chimico 8 16 32
Sale 2 4 8

Preparazione

  1. Inserire il cestello nella pentola, versare acqua, portare ad ebollizione (il livello dell'acqua non deve superare il cestello)
  2. In una ciotola mescolare zucchero + acqua + olio
  3. In un'altra ciotola setacciare farina, cacao, lievito e sale
  4. Versare i liquidi nelle polveri e mescolare con la frusta fino ad ottenere una pastella priva di grumi
  5. Versare il composto nella tortiera
  6. Cuocere per circa 40 minuti o fino a temperatura interna 95ºC o prova stecchino (al microonde 19 minuti a potenza 220W)
  7. Lasciar raffredare
  8. Sformare
  9. Mangiare

Dati nutrizionali

Calorie 100 g300
Carboidrati60%
Proteine5%
Grassi35%
Costo totale ingredienti0,53 euro
Peso finale440 g
Prezzo al kg1,20 euro


Chocolate cake no bake (steamed)

Utensils

  • 2 bowls
  • Whisk
  • Spatula
  • Cake tin 18 cm diameter
  • Steamer basket
  • Pot that contain steamer + cake tin and can be covered with the lid

The recipe

Ingredients

  • Sugar 100 g
  • Water 165 g
  • Vegetable oil (sunflower) 45 g
  • Cake (AP) flour 130 g
  • Cocoa powder 20 g
  • Baking powder 8 g
  • Salt 2 g

Method

  1. Put the steamer on the pot, pour water, bring to a boil (water level should be under the steamer)
  2. In a bowl, mix sugar, water and oil until sugar is dissolved
  3. In another bowl sieve flour, cocoa powder, baking powder and salt
  4. Pour the liquids on the dry ingredients and whisk until smooth
  5. Pour the batter on the tin
  6. Cook for 40 minutes (internal temperature 95ºC • 203 F
  7. Let it cool
  8. Eat

Nutritional facts

Calories 100 g300 kcal
Carbohydrates60%
Proteins5%
Fat35%

domenica 2 settembre 2012

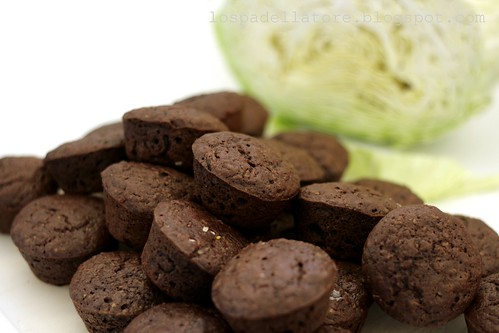
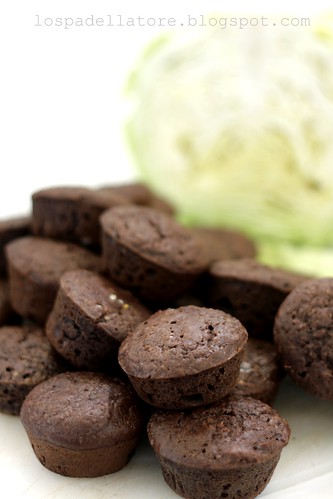
Muffin del cavolo / Cabbage muffins

English version here.

La foto

Cabbage muffins / Muffin del cavolo

Dati EXIF qui.

La storiella

Ok, sto giro ho provato a fare proprio una cosa estrema... A dire il vero non proprio, visto le verdure si usano già per fare i dolci. Nella mia limitata esperienza a questo scopo ho usato... vediamo... carote, barbabietole, rabarbaro (ma è una verdura o un frutto?!), zucca e... non ricordo. :)

È molto fico azzardare nuovi abbinamenti dolce/salato. Restare sempre nei soliti schemi e nelle solite ricette classiche è un po' noioso... Ci sono molti classici accoppiamenti come pere e formaggi, prosciutto e melone, cioccolato e melanzane, formaggi con marmellate e miele. Dato che mi piace provocare, perché non provare qualcosa di blasfemo? Di farlo provare agli amici neanche ci provo, tanto lo mangio io! (Anche se scommetto che se farei provare piacerebbe di sicuro, ma sai qualcosa che non sia pasta al pomodoro, carbonara o pesto non esiste... :-)).

Allora, ieri ho comprato una delle verdure in stagione qui in Australia, un bel cavolo cappuccio di 2.3 kg per 99 centesimi. Che taccagno. :D

1 kg l'ho usato per farmi una bella crema per la settimana prossima da usare per la pasta o come contorno. E poi? Pazza idea, usiamolo per fare un dolce!

Così il bel cavolo è diventato la base per dei bei muffin ASI. Il risultato? Muffin che sanno di cioccolato! Eh si, il sapore del cavolaccio è talmente sobrio che i dolcetti sanno solo di cacao... La prossima volta devo provare una combinazione diversa, così almeno saprà un gusto del cavolo. :)

Cabbage muffins / Muffin del cavolo

Dati EXIF qui.

La ricetta

Ingredienti Mise en place (per 12 muffin)

  • Cavolo cappuccio: 400 g
  • Farina autolievitante: 370 g
  • Cacao amaro: 30 g
  • Zucchero: 180 g
  • Uova: 4 (220 g)
  • Burro: 60 g
  • Latte: 40 g

Preparazione

  1. Preriscaldare il forno a 180°
  2. Tagliare il cavolo e cuocerlo al microonde per 6 minuti
  3. Preparare 2 teglie da 12 muffin con i pirottini (io le ho di silicone e non ce li metto)
  4. Setacciare la farina ed il cacao in una ciotola con un pizzico di sale
  5. Fondere il burro
  6. Frullare zucchero, uova, burro fuso, e latte
  7. Versare i liquidi nella farina
  8. Mescolare il meno possibile fino ad amalgamare il composto (anche se resta grumoso va bene, l'importante è non mescolare troppo altrimenti la farina sviluppa il glutine e i muffin diventano gommosi)
  9. Versare l'impasto nelle teglie (io uso il "coso" per il gelato)
  10. Infornare per 25-30 minuti (fare la prova stecchino)
  11. Far raffreddare su una gratella
  12. done.

Dati nutrizionali

Calorie per 100 g270 kcal
Carboidrati64%
Proteine10%
Grassi26%

Dati EXIF qui.

L'angolo della cultura

La vitamina C nel cavolo è piuttosto alta, ma la cottura ne abbassa il livello.

La puzza del cavolo è dovuta al contenuto di zolfo, che può essere ridotta utilizzando la pentola a pressione.

Share

Riferimenti: http://www.albanesi.it/Alimentazione/cibi/cavolfiore.htm


The photo

Cabbage muffins / Muffin del cavolo

EXIF data here.

The little history

Ok, this time I tried to makes something extreme. Actually not really, since vegetable are usually used to bake something sweet. In my limited knowledge I had experienced only a few ingredients for this purpuse: carrots, beetroot, rhubarb (is it a vegetable or a fruit?), pumpkin and... I don't remember. :)

I always want to test new food pairings between sweet and salty ingredients. There are a lot of classic (Italian) nice coupling like cheese and pears, ham and melon, chocolate and eggplants or cheeses with jams and honey. Yesterday I bought a vegetable in season: a very big cabbage, 2.3 kg for 99 cents. :D

So I used 1 kg of cabbage for making a nice cream for next cream then the crazy idea: let's use it for making a dessert!

So I use it like apples, pears, carrots and others low-carb ingredients that can be used to bake an ASI cake. The results? Some muffins that only taste of chocolate! Yes, the cabbage flavour is so smooth that the final result taste only of cocoa powder... Next time I will try a different combination in order to enhance the cabbage flavour!

Cabbage muffins / Muffin del cavolo

EXIF data here.

The recipe

Ingredients Mise en place (for 12 muffins)

  • Cabbage: 400 g
  • Self-raising flour: 370 g
  • Cocoa powder: 30 g
  • Caster sugar: 180 g
  • Eggs: 4 (220 g)
  • Unsalted butter: 60 g
  • Milk: 40 g

Method

  1. Preheat oven to 180°
  2. Sliced cabbage and cooked in the microwave for 6 minutes
  3. Line and grease 2 12 muffins trays (I used sylicon)
  4. Sift flour and cocoa powder in a big bowl with a pinch of salt
  5. Melt the butter
  6. Blend sugar, eggs, melted butter and milk (or just mix by hand)
  7. Stir liquids into flour, not overmix (otherwise gluten will develop and muffins will be gummy)
  8. Spoon mixture into muffins trays.
  9. Bake for 25-30 minutes (a skewer insered in the middle should come out clean and dry)
  10. Cool on a rack
  11. done.

Nutritional facts

Calories 100 g270 kcal
Carbohydrates64%
Proteins10%
Fat26%

EXIF data here.

The culture corner

Vitamin C in cabbage is quite high but cooking process lower this amount.

Cabbage smells bad because of sulfur. In order to avoid this inconvenient cabbage can be cooked on pressure cooker.

Share

domenica 5 febbraio 2012

Risotto zucca cioccolato / Risotto pumpkin chocolate

English version here.

La foto

Risotto zucca cioccolato / Risotto pumpkin chocolate

Dati EXIF: f/2.8, esposizione 1/15 secondi, ISO 100, distanza focale 50 mm

La storiella

Un'altra storiella per il contest di Giancarla. La gaffe non l'ho fatta io ma un mio amico. :D

Tre settimane fa eravamo ad un concerto in giardino all'art center. Io e altri due amici andiamo a fare un giro nel museo a dare un'occhiata all'esibizione di arte moderna. Non siamo esperti in materia, quindi provate ad immaginare cosa possiamo capire di arte astratta... Incrociamo 3 ragazze carine ed il mio amico con un bel sorriso sarcastico: "Ma che figata di esposizione in questo museo, non trovate?". Una delle donzelle: "Io ci lavoro qui.". Questa volta ho fatto io il bastardo assieme all'altro amico, ce la siamo svignata lasciando il dongiovanni a cercare di giustificare il complimento. :D

Contest amarcord

La ricetta

Risotto semplicissimo (se così si può chiamare), solo tre ingredienti principali: riso, zucca e cioccolato

Ingredienti

  • Riso per risotto (Arborio, Carnaroli o Vialone nano): W g
  • Purea di zucca: 2*W g
  • Salsa al cioccolato: W/4 g
  • Acqua: 10*W g
  • Sale: 0,035*W g

Preparazione

  1. Per la salsa al cioccolato: in un pentolino sciogliere 5 g di zucchero, 5 g di cacao amaro, 5 g di maizena in 100 di acqua, far sobbollire fino ad ottenere la consistenza di una salsa
  2. portare ad ebollizione l'acqua con il sale
  3. scaldare un pentolino a fondo basso a fuoco medio alto
  4. tostare il riso a secco per circa un minuto
  5. opzionale: sfumare con del vino bianco, lasciare evaporare l'alcool
  6. aggiungere l'acqua al riso e portare a cottura (sapete come si fa, vero? ;))
  7. Cinque minuti prima della cottura del riso, riscaldare la purea di zucca (microonde) e aggiungerla al riso
  8. quando il riso è cotto al dente impiattare, versare gocce di salsa al cioccolato con un cucchiaino
  9. magnare altrimenti diventa freddo ;)

Dati nutrizionali

Calorie totali254 kcal
Peso finale270 g
Calorie per 100 g95 kcal
N. porzioni1
Carboidrati86%
Proteine10%
Grassi4%

L'angolo della cultura

Questa è una primo ASI, meno di 100 kcal/100 g.

Riferimenti:

Share


The photo

Risotto zucca cioccolato / Risotto pumpkin chocolate

Dati EXIF: f/2.8, exposure 1/15 seconds, ISO 100, focal length 50 mm

The little history

Another little history for Giancarla's contest. Not my gaffe but of a friend of mine.
3 weeks ago we were attending a nice concert on Sunday afternoon on the courtyard of an art center. We went for a walk inside the museum to watched the current modern art exibition. We're not modern art expert, so image what we could understand about abstract art... we cross three nice girls and my friend said with a big sarcastic smile: "What a fantastic museum, isn't it?". A girl replied: "Actually, I worked here." This time I was the bastard that ran away and let our poor friend trying to explain his previous appreciation. :D

Contest amarcord

The recipe

Very simple risotto, only 3 main ingredients: rice, pumpkin, chocolate sauce

Ingredients

  • Rice for risotto (Arborio, Carnaroli or Vialone nano): W g
  • Cooked and mashed pumpkin: 2*W g
  • Chocolate sauce: W/4 g
  • Water: 10*W g
  • Salt: 0,035*W g

Method

  1. For the chocolate sauce: for every 100 g of water stir in 5 g of sugar, 5 g of cocoa powder, 5 g of cornstarch, bring to simmer and reduce to a thick consistency
  2. bring water to a boil with the salt
  3. heat a heavy bottom pot to medium high and add the rice
  4. toast rice for a minute
  5. add water and cooked risotto (you know how to do it, right? ;-))
  6. 5 minutes before rice is cooked warm and add mashed pumpkin to the rice
  7. when rice is cooked, plate and add with a spoon drop the chocolate sauce at your taste
  8. eat

Nutrizional facts

Total calories254 kcal
Final weight270 g
Calories 100 g94 kcal
Portions1
Carbohydrates86%
Proteins10%
Fat4%

The culture corner

This is an ASI recipe, less than 100 kcal/100g.

References:

Share


mercoledì 28 dicembre 2011

Riso(tto), cacao, pere / Risotto, cocoa, pears

English version here.

La foto

Riso(tto), cacao, pere / Risotto, cocoa, pears

Dati EXIF: f/2.5, esposizione 1/50 secondi, ISO 400, distanza focale 50 mm

La storiella

Questa la appunto che ne vale la pena. Solo ricette "inventate" da oggi. O almeno non copia-incollate da qualche altra parte. Mi sono un po' rotto le scatole di fare un post settimanale in cui propongo una ricetta della quale ce ne sono ennemila di uguali in rete.

Mi sto troppo appassionando a progettare piatti come fanno gli chef. Appuntiamo questo video in cui Achaz spiega come si fa. E pure questa puntata del podcast di Jacob Burton. Non ho ancora capito benissimo l'algoritmo della composizione dei sapori, ma piano piano ci arriverò. Sta appunto qui la bravura degli chef. Un ottimo punto di partenza è il sito foodpairing.com, un database ingredienti. Una volta scelto un cibo compare uno schema in cui vengono visualizzati gli ingredienti "accopiabili" in base all'affinità dei sapori. Un lavoretto di 5 anni che ha comportato l'analisi chimica in laboratorio degli ingredienti e la produzione della base di dati. (Per questo il sito è a pagamento). La versione free permette di utilizzare 100 ingredienti. Mica male.

Pure sto tipo fa ricette interessanti.

Da quello che ho capito per progettare un piatto si parte da un ingrediente principale, poi si abbinano gli altri ingredienti in modo da esaltarlo; gli ingredienti aggiunti devono essere a loro volta affini tra di essi. La scelta dei singoli avviene in modo tale da bilanciare le componenti gustative (salato/dolce/amaro/aspro) e le consistenze (morbido/croccante, caldo/freddo) giocando sui contrasti. Il grasso viene compensato dall'acido. La cipolla caramellata di Oldani è un ottimo esempio di piatto bilanciato: cipolla (dolce e morbida), sfoglia (croccante), gelato di grana (freddo dolce), salsa di grana (caldo e salato). Figata. :D

Ora ogni volta che vedo un piatto mi diverto ad analizzare tali componenti. Anche la pasta al pomodoro. Grasso dell'olio e del grana compensati dall'acido del pomodoro. Se il pomodoro è troppo acido si aggiunge lo zucchero. O la caprese: il grasso/dolce della mozzarella compensa l'acido del pomodoro. Facile no? :)

Appunto il riso(tto) che ho appena fatto, ispirato tra l'altro guardando il video del zafferano e riso di Oldani... Alla prossima. La settimana prossima. O forse l'anno prossimo. :D

Riso(tto), cacao, pere

Ingredienti

Per il riso(tto)

  • riso arborio 100 g
  • acqua salata: 500 g (ho messo 5 g di sale, troppi!)
  • burro non salato: 10 g
  • succo di limone: 5 g

Per la salsa al cacao (ne basta la metà

  • acqua: 100 g
  • cacao in polvere: 5 g
  • maizena (o un altro amido): 5 g

Purea di pere

  • pera sminuzzata: 1
  • zucchero: 10 g per 100 g di polpa
  • sherry (opzionale): 5/10 g

Preparazione

Salsa al cacao

  1. in un pentolino sciogliere nell'acqua cacao e maizena, scaldare a fuoco medio basso fino ad otterere la consistenza di una salsa
  2. lasciare raffreddare, conservare in un contenitore per salse (quelli col beccuccio, così poi disegnate la spirale)

Purea di pere

  1. in un pentolino versare pera sminuzzata, zucchero e sherry, scaldare a fuoco medio basso fino ad otterere la consistenza di una salsa, tenere da parte

Riso(tto)

  1. portare ad ebbolizione l'acqua salata
  2. versare il riso, tostare per 10 secondi, coprire con l'acqua salata, portare a cottura
  3. a cottura ultimata togliere dal fuoco, mantecare con burro e succo di limone (il riso deve essere all'onda, più liquido che solido)
  4. lasciare riposare un paio di minuti con il coperchio

Assemblamento

  1. versare il riso nel piatto, battere il fondo per distribuirlo uniformemente
  2. disegnare una spirale con la salsa al cacao (alla Oldani :-))
  3. distribuire "casualmente" con un cucchiano la salsa di pere

Magnare: il boccone ideale prevede riso (corpo + parte grassa), cacao (acido amaro), pere (acido dolce).

Giudizio: componente grassa scarsa. Migliorare la texture aggiungendo la componente croccante. Del parmigiano sciolto steso su carta forno ed essicato ci starebbe benone mi sa... Qualche suggerimento?

Dati nutrizionali

Calorie totali340 kcal
Peso finale200 g
Calorie per 100 g170 kcal
N. porzioni1
Peso porzione200 g
Calorie porzione340 kcal
Carboidrati70%
Proteine6%
Grassi25%

Riso(tto), cacao, pere / Risotto, cocoa, pears

Dati EXIF: f/2.5, esposizione 1/50 secondi, ISO 400, distanza focale 50 mm

L'angolo della cultura

Riferimenti:

Share


Riso(tto), cacao, pere / Risotto, cocoa, pears

Dati EXIF: f/2.5, exposure 1/50 seconds, ISO 400, focal length 50 mm

The little history

I'm taking note of this recipe because it worth. Only "invented" recipes from myself from today. Or at least not copied-and-paste from somewhere else. I was a little bit annoyed of posting a weekly recipe when there are a lot of equals on the internet.

I'm very interested on learning how to build a dish following principles of chefs. I'll take note of this video in which Achaz explain food bouncing. And this episode of Jacob Burton's podcast as well. I haven't understood yet the way of flavours composition, but step by step I can do it. :) A good starting point is the website foodpairing.com, a database of ingredients. Here you can learn how to use it.

This guy make good recipes inspired on these principles.

I understood that in order to build a dish you have to choose your main ingredient, then you add new in order to enhance it; additional ingredients should be paired between each other. A new ingredient should be choosed in order to balance flavours, tastes (salty/sweet/bitter/sour), texture (soft/crunchy, warm/cold) by playing with contrasts. Fat is balanced by acid. Davide Oldani's caramelized onion is a good example of balanced dish: onion (sweet and soft), crust (crunchy), parmesan ice cream (cold and sweet), parmesan sauce (hot and salty). Very cool. :D

This is a risotto I've just cooked, inspired by watching this video (riso e zafferano, rice and saffron).

Risotto, cocoa, pears

Ingredients

For risotto

  • rice arborio 100 g
  • salty water: 500 g (I used 5 g of salt, too much!)
  • unsalted butter: 10 g
  • lemon juice: 5 g

Cocoa sauce (I used ⅓...)

  • water: 100 g
  • cocoa powder: 5 g
  • cornstarch: 5 g

Pear puree

  • minced pear: 1
  • sugar: 10 g every 100 g of fruit pulp
  • sherry (optional): 5/10 g

Method

Cocoa sauce

  1. in a small pot, stir cocoa and cornstarch in water until dissolved, bring to a simmer, reduce to a sauce consistency
  2. cool, place in a sauce container (in order to draw the spiral)

Pear puree

  1. in a small pot, cobine pear, sugar and sherry, versare pera sminuzzata, zucchero e sherry, bring to a simmer, reduce to a sauce consistency

Risotto

  1. bring salty water to a boil
  2. in another small heavy bottomed pot, toast the rice for 10 seconds, cover with salty water, cook the rice (10-15 min, add water when is almost absorbed)
  3. when cooked remove from fire, stir in butter and lemon juice, (rice should be creamy, almost liquid)
  4. cover with the lid, wait for a couple of minutes

Plating

  1. place rice on a round plate, distribute evenly by beating the bottom of the plate
  2. draw a spiral with the chocolate sauce
  3. with a spoon, distribuite pear puree randomly

Eat: the ideal bite should have rice (body + fat), cocoa sauce (bitter acid), pear (sweet acid)

Opinion: lack of fat component. Improve texture with something crunchy. Melted parmesan dryed on the oven in order to make a crust should be good... any suggestions? ;-)

Dati nutrizionali

Total calories340 kcal
Final weight200 g
Calories 100 g170 kcal
Portions1
Carbohydrates70%
Proteins6%
Fat25%

Riso(tto), cacao, pere / Risotto, cocoa, pears

Dati EXIF: f/2.5, exposure 1/50 seconds, ISO 400, focal length 50 mm

The culture corner

References:

Share


martedì 20 settembre 2011

CCC - Cottage Chocolate Cheesecake

English version here.

La foto

Cottage chocolate cheesecake

Dati EXIF: f/4.0, esposizione 1/50 secondi, ISO 200, distanza focale 50 mm

La storiella

Devo dire che in questo periodo mi sto divertendo un casino. Il lavoro va benone (certe mattine posso dire di svegliarmi dicendo: "sono proprio contento di andare al lavoro", lo so sapete che non sono una persona normale, ma l'ultimo progetto mi ha preso bene... ;-)), ogni sera riesco a correre almeno 10 km senza infortunarmi, nel fine settimana la mia amata cooking session del sabato pomeriggio, la sera festa, domenica mattina gara di corsa e poi grigliata a mezzogiorno con gli amici!! Che posso chiedere di più? Il tempo (piove un po' troppo ultimamente) e tempo per fare fotografie di food e scrivere il mio post settimanale. Ok, posso sopravvivere lo stesso... ;-)

Per la grigliata a pranzo di domenica scorsa avevo pensato di preparare una cheesecake al cioccolato, su richiesta delle rappresentanti di genere femminile, che sembrano proprio essere cioccolato-dipendenti... Così venerdì sera, tornando a casa dal lavoro, mi sono fermato al supermercato a comprare gli ingredienti per la tortazza, ma siccome sono un taccagno (e salutista) di prima categoria ho comprato il cottage cheese (i fiocchi di latte, la Jocca, tanto per capirsi....), anzichè il Philadelphia (da Coles non hanno il cream cheese della marca base-economica come da Woolworths...).

Il risultato? Una cheesecake semi-salata-grumosa... (li vedete i puntini bianchi!?). Ho deciso di non offrire agli amici tale capolavoro, così ho optato per la solita cioccolato e pere che non tradisce mai! Sono fortunato qui in Australia, tutti sembrano apprezzare i "classici". Ma forse sono solo educati... ;-). Vabbè che sono un sostenitore del principio KISS, ma certe volte sono quasi imbarazzato quando mi fanno i complimenti per certi piatti veramente semplici e banali...

L'unica cosa buona di questa pseudo-ricetta è che ho trovato (forse) una buona base alternativa per la cheesecake, diversa dalla classica biscotti tritati+burro fuso. Il sottoscritto salutista non usa i biscotti commerciali fatti con margarina e grassi idrogenati... Ho usato una base preparata con una sana base di farina+zucchero+uova+burro. Ok, l'inconveniente è che ho usato la farina autolievitante invece di quella normale, ottenendo una base alta 1 cm prima di versarvi il ripieno sopra!

Cottage chocolate cheesecake

Dati EXIF: f/4.0, esposizione 1/40 secondi, ISO 200, distanza focale 50 mm

La ricetta

Per una tortiera a cerniera di 23 cm di diametro.

Ingredienti

Per la base

  • Uova: 2 (90 g)
  • Farina 00: 100 g (Ho usato quella auto-lievitante, ma voi usate quella normale)
  • Burro: 50 g
  • Pizzico di sale

Per il ripieno:

  • Cottage cheese (fiocchi di latte, Jocca, a temperatura ambiente: 600 g (dovreste usare cream cheese, tipo Philadelphia o ricotta)
  • Succo di limone: 20 g (meglio buccia grattugiata mi sa)
  • Vaniglia: 5 g
  • Cioccolato fondente: 170 g (ho preso una confezione dal 200 g ma 30 g me li sono pappati a cena)
  • Zucchero: 125 g
  • Uova: 4 (224 g)
  • Panna acida: 300 g (potete farla la sera prima con della panna a cui aggiungete un paio di cucchiai di succo di limone, mi pare)

Preparazione

  1. Imburrare ed infarinare la tortiera - ho usato la carta forno
  2. Preriscaldare il forno a 160°, (140° se ventilato)
  3. Per la base, amalgamare gli ingredienti, versare la pastella sul fondo della tortiera ed infornare per 10 minuti
  4. In una ciotola capiente, usando una frusta, amalgamare il formaggio cremoso, succo di limone e vaniglia - potete mescolare quanto volete, voglio vedere se riuscite a sciogliere i grumi dei fiocchi di latte!
  5. Incorporare lo zucchero
  6. Incorporare un'uovo alla volta
  7. Incorporare la panna acida
  8. Estrarre la tortiera dal forno, versarvi il ripieno e infornare per circa un'ora e 20 minuti - non so quale si il tempo esatto, credo si aggiri tra 1 ora e 1 ora e mezza
  9. Spegnere il forno e lasciare raffredare completamente la torta per un paio di ore. È importante non tirarla fuori dal forno, altrimenti si abbassa e "crepa".
  10. Raffreddare la torta in frigorifero per un altro paio di ore - per questo la preparo il giorno prima
  11. Buon appetito! In realtà non molto, ma se qualcuno prova questa ricetta mi faccia sapere se questa ricetta è da buttare o se è commestibile!! ;-)

Dati nutrizionali

Calorie totali3800 kcal
Peso finale1400 g
Calorie per 100 g270 kcal
N. porzioni12
Peso porzione117 g
Calorie porzione317 kcal
Carboidrati42%
Proteine14%
Grassi44%

L'angolo della cultura

Riferimenti:

Share


The photo

Cottage chocolate cheesecake

EXIF data: f/4.0, shutter speed 1/40 seconds, ISO 200, focal lenght 50 mm

The little story

I should say that in this period I had a lot of fun. Work is good (some morning I could say that I'm happy to go to work, yes you know I'm not a normal person... ;-)), every evening I can run at least 10 km with no injuries, on the weekend my lovely Saturday afternoon cooking session, party at evening, running race on Sunday morning and bbq at lunch! What could I ask more? Better weather and more time for taking food photographs and writing my weekly blog post. Ok, I can survive the same... ;-)

For last Sunday lunch bbq I planned to bake a chocolate cheesecake, since a lot of female representative seems to be dependent from this strange kind of food. So on Friday evening on coming back from work I bought ingredients for baking a chocolate cheesecake, but since I'm a first category mean I bought cottage cheese instead of the expensive Philadelphia cream cheese because I didn't find the cheap brand of cream cheese.

The result? A salty-full-of-lumps filling (could you see the black points?!). I prefered not to offer this kind of experiment to my friends, so I baked an always-successful chocolate and pear cake! Here in Australia I'm lucky all the people appreciate a dish even if it's very classic and simple. Or maybe they're very polite... ;-)

The good thing about this cake is that I almost found an alternative way for the cheesecake's base. I don't want to use that commercial-fat-hydrogenated bisquits for the base... I prepared an healty flour+eggs+butter+sugar batter that I baked for 5 minutes before put on the filling. Ok, the last inconvenient was that I used self-raising flour, so the base was 1 cm thick before put the filling on top! :D

Cottage chocolate cheesecake

EXIF data: f/4.0, shutter speed 1/50 seconds, ISO 200, focal lenght 50 mm

The recipe

For a 24 cm loose-based round cake tin.

Ingredients

For the base:

  • Eggs: 2 (90 g)
  • Flour: 100 g (I used self-rising flour, but you should use the normal one)
  • Butter: 50 g
  • Pinch of salt

For the filling

  • Cottage cheese (at room temperature): 600 g (you should use cream cheese, like Philadelphia)
  • Lemon juice: 20 g
  • Vanilla imitation: 5 g
  • Dark chocolate: 170 g
  • Sugar: 125 g
  • Eggs: 4 (224 g)
  • Sour cream: 300 g

Method

  1. Grease and line the cake tin - I used greaseproof paper
  2. Preheat the oven to 160°, (140 ° fan)
  3. For the base, combine all the ingredients, pour on the bottom of the cake tin and bake for 10 minutes
  4. In a large bowl, beat cottage (cream) cheese, lemon juice and vanilla with a whisk - You can for ages, cottage cream's lumps won't disappear... :D
  5. Add the sugar and whisk until combined
  6. Whisk in one egg at time until incorporated
  7. Stir in sour cream
  8. Take the cake tin from the oven, fill with filling and bake for about 1 hour and 20 minutes - I don't know which is the right baking time but it should be between 1 hour and 1 hour and half
  9. Switch off the oven and let the cake in the oven for until completely cooled. It's very important, otherwise the cake will collapse and crack.
  10. Cool in the refrigerator for a couple of time.
  11. Enjoy! Not really, it's not a very tasty cake if you use cottage cheese, but I'd like you to try and let me know if you like it!! ;-)

Nutritional facts

Total calories3800 kcal
Final weight1400 g
Calories 100 g270 kcal
N. portions12
Weight per portion117 g
Calories per portion315 kcal
Carbohydrate42%
Proteins14%
Fat44%

The culture corner

References:

Share
domenica 19 settembre 2010

Torta cacao e pere / Cocoa and pears cake

English version here.

La foto

Cocoa and pears cake

Dati EXIF:

  • apertura: f/2.8
  • tempo di esposizione: 1/6 secondi
  • ISO: 100
  • distanza focale: 50 mm

La storiella

In questo momento sto mangiando una torta alle carote ASI, ma voglio raccontare della torta che ho fatto ieri, una combinazione classica: cioccolato e pere. Ci sono due tipi di abbinamenti che mi piacciono, il primo cacao e pere, il secondo con i pezzi di cioccolato fondente mescolati nell'impasto. Il risultato è un po' diverso, penso di preferire il secondo in quanto mi piace "masticare" e sentire i sapori separati. Questa volta ho usato il metodo per preparae i muffin: separare ingredienti secchi da quelli liquidi per poi mischiarli non troppo. Il risultato finale è più che buono!

La ricetta

Ingredienti

  • Pere: 450 g
  • Farina autolievitante: 420 g
  • Latte intero: 400 g
  • Zucchero: 320 g
  • Uova: 3 medie (165 g)
  • Burro: 100 g
  • Cacao amaro: 80 g

Preparazione

  1. Preriscaldare il forno a 180°C
  2. Preparare le tortiere. Io ho usato una tortiera in silicone di 18 cm di diametro e una di silicone da plumcake da 23 cm
  3. Tagliare le pere nella forma preferita
  4. Mescolare farina, cacao e zucchero in una ciotola
  5. Sbattere leggermente le uova in un altra ciotola con il latte ed il burro sciolto (l'ho messo a sciogliere nel microonde tagliato a pezzetti per 40 secondi)
  6. Mescolare non troppo gli ingredienti liquidi con quelli secchi con una spatola fino ad ottenere un impasto uniforme
  7. Aggiungere le pere all'impasto
  8. Versare l'impasto nelle tortiere
  9. Infornare per 40 minuti, fare la prova stecchino
  10. Lasciare le/a torte/a in forno per 5 minuti, estrarle e lasciarle raffreddare in una graticola fino ad asciugamento

Dati nutrizionali

Calorie totali4636 kcal
Peso finale1900 g
Calorie per 100 g244 kcal
N. porzioni12
Peso porzione158 g
Calorie porzione386 kcal
Carboidrati62%
Proteine9%
Grassi29%

L'angolo della cultura

Questa volta niente da spiegare, solo un elenco degli abbinamenti classici di gusti italiani:

  • Prosciutto e melone
  • Cioccolato e pere
  • Pere e formaggio
  • Formaggio e miele/marmellata
  • Pizza tonno cipolla
  • Pizza prosciutto e funghi
  • Pizza gorgonzola e speck
  • Lapsus... non ne ricordo più! Qualche suggerimento: ;-)

Share


The photo

Cocoa and pears cake

EXIF data:

  • aperture: f/2.8
  • shutter speed: 1/6 seconds
  • ISO: 100
  • focal lenght: 50 mm

The little story

In this moment I'm eating an ASI carrot cake, but I'm writing about the cake I baked yesterday, a classic combination: chocolate and pears. There are two recipes that I liked, the first one with cocoa powder and pears, the second one with pieces of plain chocolate mixed in the dought. The result is a little bit different, I think I prefer the second one, since I like chewing and taste the flavour separately. This time I used the preparation for baking muffins: separate dry from wet ingredients and mix them not very much. The final result is good!

The recipe

Ingredients (for a 18 cm bake tin and a 23 cm plumcake tin)

  • Pears: 450 g
  • Self raising flour: 420 g
  • Milk: 400 g
  • Sugar: 320 g
  • Eggs: 3 (165 g)
  • Butter: 100 g
  • Cocoa powder: 80 g

Preparation

  1. Preheat the oven at 180°C
  2. Grease/prepare your bake tin. I used two silicon bake tin, one round of 18 cm of diameter and one of 23 cm for plumcake
  3. Cut pears in your favourite shape
  4. Mixed flour, cocoa powder and sugar in a bowl
  5. Beat the eggs in another bowl with milk and melted butter (I melt sliced butter in the microwave for 40 seconds)
  6. Put the wet ingredients on the dry and mix with a spatula until the dough is uniform
  7. Add and mix the pears to the dough
  8. Put the mixture on the tin/s
  9. Bake for 40 minutes, or until a skewer insert on the center comes out clean and dry
  10. Leave the cake in the oven for 5 minutes, then extract from the tin and put on a grill for drying

Nutritional facts

Total calories4636 kcal
Final weight1900 g
Calories 100 g244 kcal
N. portions12
Weight per portion158 g
Calories per portion386 kcal
Carbohydrate62%
Proteins9%
Fat29%

The culture corner

This time I don't have nothing to explain, only some notes about classical Italian flavours's combinations:

  • Pears and chocolate
  • (Raw) ham and melon
  • Cheese and honey/jam
  • Tuna and onion pizza
  • Ham and mushrooms pizza
  • Gorgonzola and speck pizza
  • Lapse... I forgot others classical combinations! Any suggestions? ;-)

Share

domenica 5 settembre 2010

Caramel chocolate shortbread

English version here.

La foto

Caramel chocolate shortbread

La prima foto scattata in una softbox costruita in 15 minuti... Post produzione con le funzioni automatiche "white balance" and "color enhance" di Gimp. Il bianco non è così bianco... ;-)

Dati EXIF:

  • apertura: f/2.8
  • tempo di esposizione: 1/30 secondi
  • ISO: 100
  • distanza focale: 50 mm

La storiella

Dal momento che mi sto allenando per la mezza maratona a oggi ho corso 25 km, ho il diritto di concedermi una bomba calorica. ;-) Così oggi ho preparato un'altra torta supercalorica tratta dal libro "Easy chocolate". La ricetta è Caramel chocolate shortbread, un dolce che si può trovare dappertutto qui in Australia. Ma questa giro qualcosa è andato storto! Stavo sciogliendo burro, zucchero e latte condensato in un pentolino. Nella ricetta è scritto di bollire per 6-7 minuti finchè il composto diventa molto denso. Ok, ho messo il pentolino sul fuoco (medio) e ho aspettato che raggiungesse l'ebollizione senza mescolare. Quando ha iniziato a sobbollire ho iniziato a mescolare e... sul fondo era iniziato a bruciacchiare tutto! Niente panico, ho continuato a mescolare, ma si è presentato un altro incoveniente: la parte liquida del burro si è separata da quella solida e non sapevo più cosa fare! Buttare via tutto? Non esiste!Ho gettato solo il liquido e ho continuato a mescolare la parte solida. Il risultato finale non è lo stesso della foto del libro ma il sapore è buono!

La ricetta

Dal libro "Easy Chocolate" (Love Food®). Le mie annotazioni in corsivo.

Ingredienti

Per la base

  • Burro non salato: 115 g (ho usato quello normale)
  • Farina 00: 175 g
  • Zucchero: 55 g

Per lo strato al caramello

  • Burro: 200 g
  • Zucchero: 115 g
  • Latte condensato: 400 g
  • Golden syrup: 55 ml (3 tbsp) (omesso)

Ultimo strato

  • Cioccolato fondente: 200 g

Preparazione

  1. Preriscaldare il forno a 180°C. Ungere una tortiera quadrata di 23 cm di diametro. (Ho usato la carta forno).
  2. Mettere burro, farina e zucchero nella planetaria finché non iniziano a mescolarsi. (Ho messo farina e zucchero nell'insalatiera di pirex e ho aggiunto il burro sciolto al microonde). Distribuire e pressare il composto nella tortiera. Infornare per 20-25 minuti o fino a doratura.
  3. Nel frattempo, preparare lo strato al caramello. Mettere burro, zucchero, golden syrup e il latte condensato in una padella e riscaldare a fuoco basso fino a che lo zucchero si sia dissolto. Portare ad ebollizione e sobbollire per 6-8 minuti, mescolando costantemente, finchè il composto diventa molto denso. Rimuovere lo shortbread dal forno, versarci sopra il caramello e lasciare raffreddare in frigorifero.
  4. Per l'ultimo strato, sciogliere il cioccolato a bagnomaria, lasciarlo raffreddare e spalmarlo sopra lo strato al caramello. Lasciare raffreddare in frigorifero. Tagliare in 12 pezzi e servire.

Dati nutrizionali

Calorie totali5892 kcal
Peso finale1000 g
Calorie per 100 g589 kcal
N. porzioni12
Peso porzione83 g
Calorie porzione491 g
Carboidrati43%
Proteine4%
Grassi53%

L'angolo della cultura

Oggi alcuni link relativi alla ricetta di oggi:

Share


The photo

Caramel chocolate shortbread

The first photo with an homemade softbox that I build in 15 minutes... Post production with automatic "white balance" and "color enhance" of Gimp. The white is not so white... ;-)

EXIF data:

  • aperture: f/2.8
  • shutter speed: 1/30 seconds
  • ISO: 100
  • focal lenght: 50 mm

The little story

Since I am training for an half marathon and today I ran 25 km, I have the right to eat a caloric bomb. ;-) So today I prepared another high-caloric cake from the book "Easy chocolate". The recipe is Caramel chocolate shortbread, a sweet that you could find everywhere here in Australia.
But this time something wrong happened! I was melting butter, sugar and condensed milk on a pot. On the recipe is written to boiled for "6-8 minutes until the mixture become very thick". Ok, I put the pot on the fire and I waited it reach the boiling without stir. When it became boiling I started mixing and... on the bottom the mixture has burned! Ok, no panic, I continued stirring, but another inconvenient came: the liquid part of the butter separated from the solid part and I didn't know what I have to do! Throw away all? No way! I threw away only the liquid, and continued to stir the solid part. The final result is not the same as the photo on the book but the taste is good!

The recipe

From the book "Easy chocolate" (Love Food®). My notes in italic.

Ingredients

For the base

  • Unsalted butter: 115 g (I used normal butter)
  • Plain flour: 175 g
  • Golden caster sugar: 55 g (I used normal sugar)

For the filling and topping

  • Butter: 200 g
  • Golden caster sugar: 115 g
  • Golden syrup: 45 ml (3 tbsp) (omitted)
  • Canned condensed milk: 400 g
  • Plain chocolate, broken in pieces: 200 g

Preparation

  1. Preheat the oven to 180°C. Grease and line the base of a 23 cm square shallow cake tin. (I used greaseproof paper).
  2. Place the butter, flour, sugar in a food processor and process until they begin to bind together. (I placed flour and sugar in a bowl and mixed together with melted butter). Press the mixture into the prepared tin and smooth the top. Bake in the preheated oven for 20-25 minutes, or until golden.
  3. Meanwhile, make the filling. Place the butter, sugar, golden syrup and condensed milk in a soucepan and heat gently until the sugar has dissolved. Bring to the boil and simmer for 6-8 minutes, stirring constantly, until the mixture becomes very thick. Remove the shortbread from the oven, pour over the filling and chill in the refrigerator until firm.
  4. To make the topping, melt the chocolate in a heatproof bowl set over a saucepan of gently simmering water. Remove from the heat, leave to cool slightly, then spread over the caramel. Chill in the refrigerator until set. Cut it into 12 pieces with a sharp knife and serve.

Nutritional facts

Total calories5892 kcal
Final weight1000 g
Calories 100 g589 kcal
N. portions12
Weight per portion83 g
Calories per portion491 kcal
Carbohydrate43%
Proteins4%
Fat53%

The culture corner

Today some links about today's recipe:

Share

giovedì 22 luglio 2010

Chocolate fudge cake

English version here.

La foto

Chocolate fudge cake

Finalmente dopo 4 mesi sono riuscito a rimpiazzare il 50mm rotto con uno nuovo! Setup non perfetto per la foto, non ho un treppiede! Ma sto studiando come migliorarmi...

La storiella

Ho deciso di riprodurre tutte le torte del libro "Easy chocolate" (Love Food) per poi rifarle in versione ASI. Questa è la prima, una bomba calorica che ovviamente è boooonaaaaa! ;-)

Ho seguito la ricetta alla lettera, eccetto per la tortiera: siccome non ne ho due da 20 cm, ho usato quella da plumcake.
Ho notato che quasi tutte le torte lievitate del libro prevedono la glassa (icing). È la prima volta che preparo una classa e ho avuto un inconveniente con la consistenza... all'inizio era troppo liquida, ma dopo 3 ore in frigo si è congelata! :D Così l'ho ri-sciolta nel microonde. :D

La ricetta

Dal libro "Easy chocolate" Love Food:

Ingredienti

  • Burro non salato (io ho usato quello normale infatti la glassa era un po' insipida), ammorbidito: 175 g
  • zucchero: 175 g
  • uova: 3 sbattute
  • golden syrup: 45 ml
  • farina di mandorle: 40 g
  • farina autolievitante: 175 g
  • pizzico di sale
  • cacao amaro: 40 g

Per la glassa:

  • cioccolato fondente a pezzi: 225 g
  • zucchero: 175 g
  • burro non salato, tagliato a pezzettini: 225 g
  • latte evaporato (ma che è?! Io non l'ho messo ;-): 75 ml
  • estratto di vaniglia: 25 ml

Preparazione

  1. Preriscaldare il forno a 180°. Ungere due basi per torta da 20 cm;
  2. Glassa: mettere cioccolato, zucchero, burro, latte evaporato (???) e l'estratto di vaniglia in una padella con fondo alto. Riscaldare a fuoco basso e mescolare costantemente, fino allo scioglimento. Mettere in una tazza e lasciar raffreddare. Coprire e raffreddare nel frigorifero per 1 ora, o fino a che diventi spalmabile;
  3. Per la torta, mettere burro e zucchero in una ciotola e lavorare con le fruste fino ad ottenere un composto soffice. Aggiungere il golden syrup e le mandorle macinate. Incorporare gradualmente nelle uova sbattute (non so se la traduzione è giusta ;-). Setacciare farina, il pizzico di sale e il cacao in una ciotola a parte, incorporare al resto dell'impasto. Aggiungere un po' d'acqua, se necessario, per ottenere la giusta consistenza;
  4. Versare l'impasto nelle tortiere ed infornare per 30-35 minuti, facendo la prova stecchino.
  5. Lasciare le torte nelle tortiere per 5 minuti, poi toglierle e lasciarle raffreddare completamente nelle apposite "griglie". Quando le torte si sono raffredate, unirle spalmando metà della glassa nel mezzo. Spalmare il resto della glassa fino a ricoprimento totale. ;-)

Dati nutrizionali

Calorie totali6527 kcal
Peso finale1224 g
Calorie per 100 g533 kcal
Carboidrati35
Proteine4
Grassi60

L'angolo della cultura

Prendo spunto da wikipedia per capire che cos'è la chocolate fudge cake: è una torta al cioccolato che contiene fudge, ossia un mix di zucchero, burro e latte che viene fuso per poi essere raffreddato in modo da assumere una consistenza "spalmabile". Di solito questo tipo di torta è rotonda (non nel mio caso ;-).


English version

The photo

Chocolate fudge cake

Finally, after 4 months I replaced my broken 50mm with a new one. Not a perfect setup for the photo, I don't have a tripod! But I'm studing how to improve...

The little story

I decided to bake all the cakes of the book "Easy chocolate" and then re-bake them on ASI version. This is the first one, a caloric bomb that obviusly taste very good! ;-).

I follow the recipe literally except for the cake tin: since I don't have 2 cake tins of 20 cm of diameter, I used the one for the plumcake.
I noticed that almost all the cakes on the book use the icing for cakes. It's the first time that I've prepared an icing and I have an incovenient with the consistency... at first it was too liquid, but after 3 hours in the fridge it has frozen! :D So I re-melted it on the microwave. :D

The recipe

From the books "Easy chocolate" Love Food:

Ingredients

  • Unsalted butter, softned, plus extra for greasing: 175 g (6 oz)
  • golden caster sugar: 175 g (6 oz)
  • eggs: 3 beaten
  • golden syrup: 45 ml (3 tbsp)
  • ground almonds: 40 g (1 1/2 oz)
  • self-raising flour: 175 g (6 oz)
  • pinch of salt
  • cocoa powder: 40 g (1 1/2 oz)

Icing:

  • plain chocolate, broken into pieces: 225 g (8 oz)
  • dark muscovado sugar: 55 g (2 oz)
  • unsalted butter diced: 225 g (8oz)
  • evaporated milk: 75 ml (5 tbsp)
  • vanilla extract: 25 ml (1/2 tbsp)

Preparation

  1. Preheat the oven to 180°C / 350°F. Grease and line the bases of 2 x 20-cm / 8-inch sandwich tins;
  2. Icing: place the chocolate, sugar, butter, evaporated milk and vanilla extract in a heavy-based saucepan. Heat gently stirring constantly, until melted. Pour into a bowl and leave to cool. Cover and chill in the refrigerator for 1 hour, or until spreadable;
  3. For the cake, place the butter and caster sugar in a bowl and beat together until light and fluffy. Gruadually beat in the eggs. Stir in the golden syrup and ground almonds. Sift the flour, salt and cocoa powder into a separate bowl, then fold into the mixture. Add a little water, if necessary, to make a dropping consistency.
  4. Spoon the mixture into the prepared tins and bake in the preheated oven for 30-50 minutes, or until springy to the touch and skewer inserted in the center comes out clean.
  5. Leave the cakes in the tins for 5 minutes, then turn out onto wire racks to cool completely. When the cakes are cold, sandwich them togeter with half the icing. Spread the remaining icing over the top and sides of the cake, swirling it to give a frosted appearance.

Nutritional facts

Total calories6527 kcal
Final weight1224 g
Calories per 100 g533 kcal
Carbohydrates35
Proteins4
Fat60

The culture corner

I take cue from wikipedia to understand what is the chocolate fudge cake: "a small chocolate pastry that contains fudge". Fudge is a mix "made by mixing sugar, butter, and milk" that is melted, then cool in a way to assume a spreadable consistency. Usually this sort of cakes are round (not in my case ;-).